info: This tutorial is written for CPT211 Programming Languages Concepts and Paradigms of semester 2 academic session 2014/2015.
Overview
There are numbers of sensors and peripherals available for Galileo boards and one of them is an analog temperature sensor lm35. At the end of the session, you should be able:
-
to understand digital and analog pins on Galileo.
-
to use lm35 on Galileo.
-
to develop IoT program for lm35 on Galileo.
-
to use Intel IoT XDK.
Basics
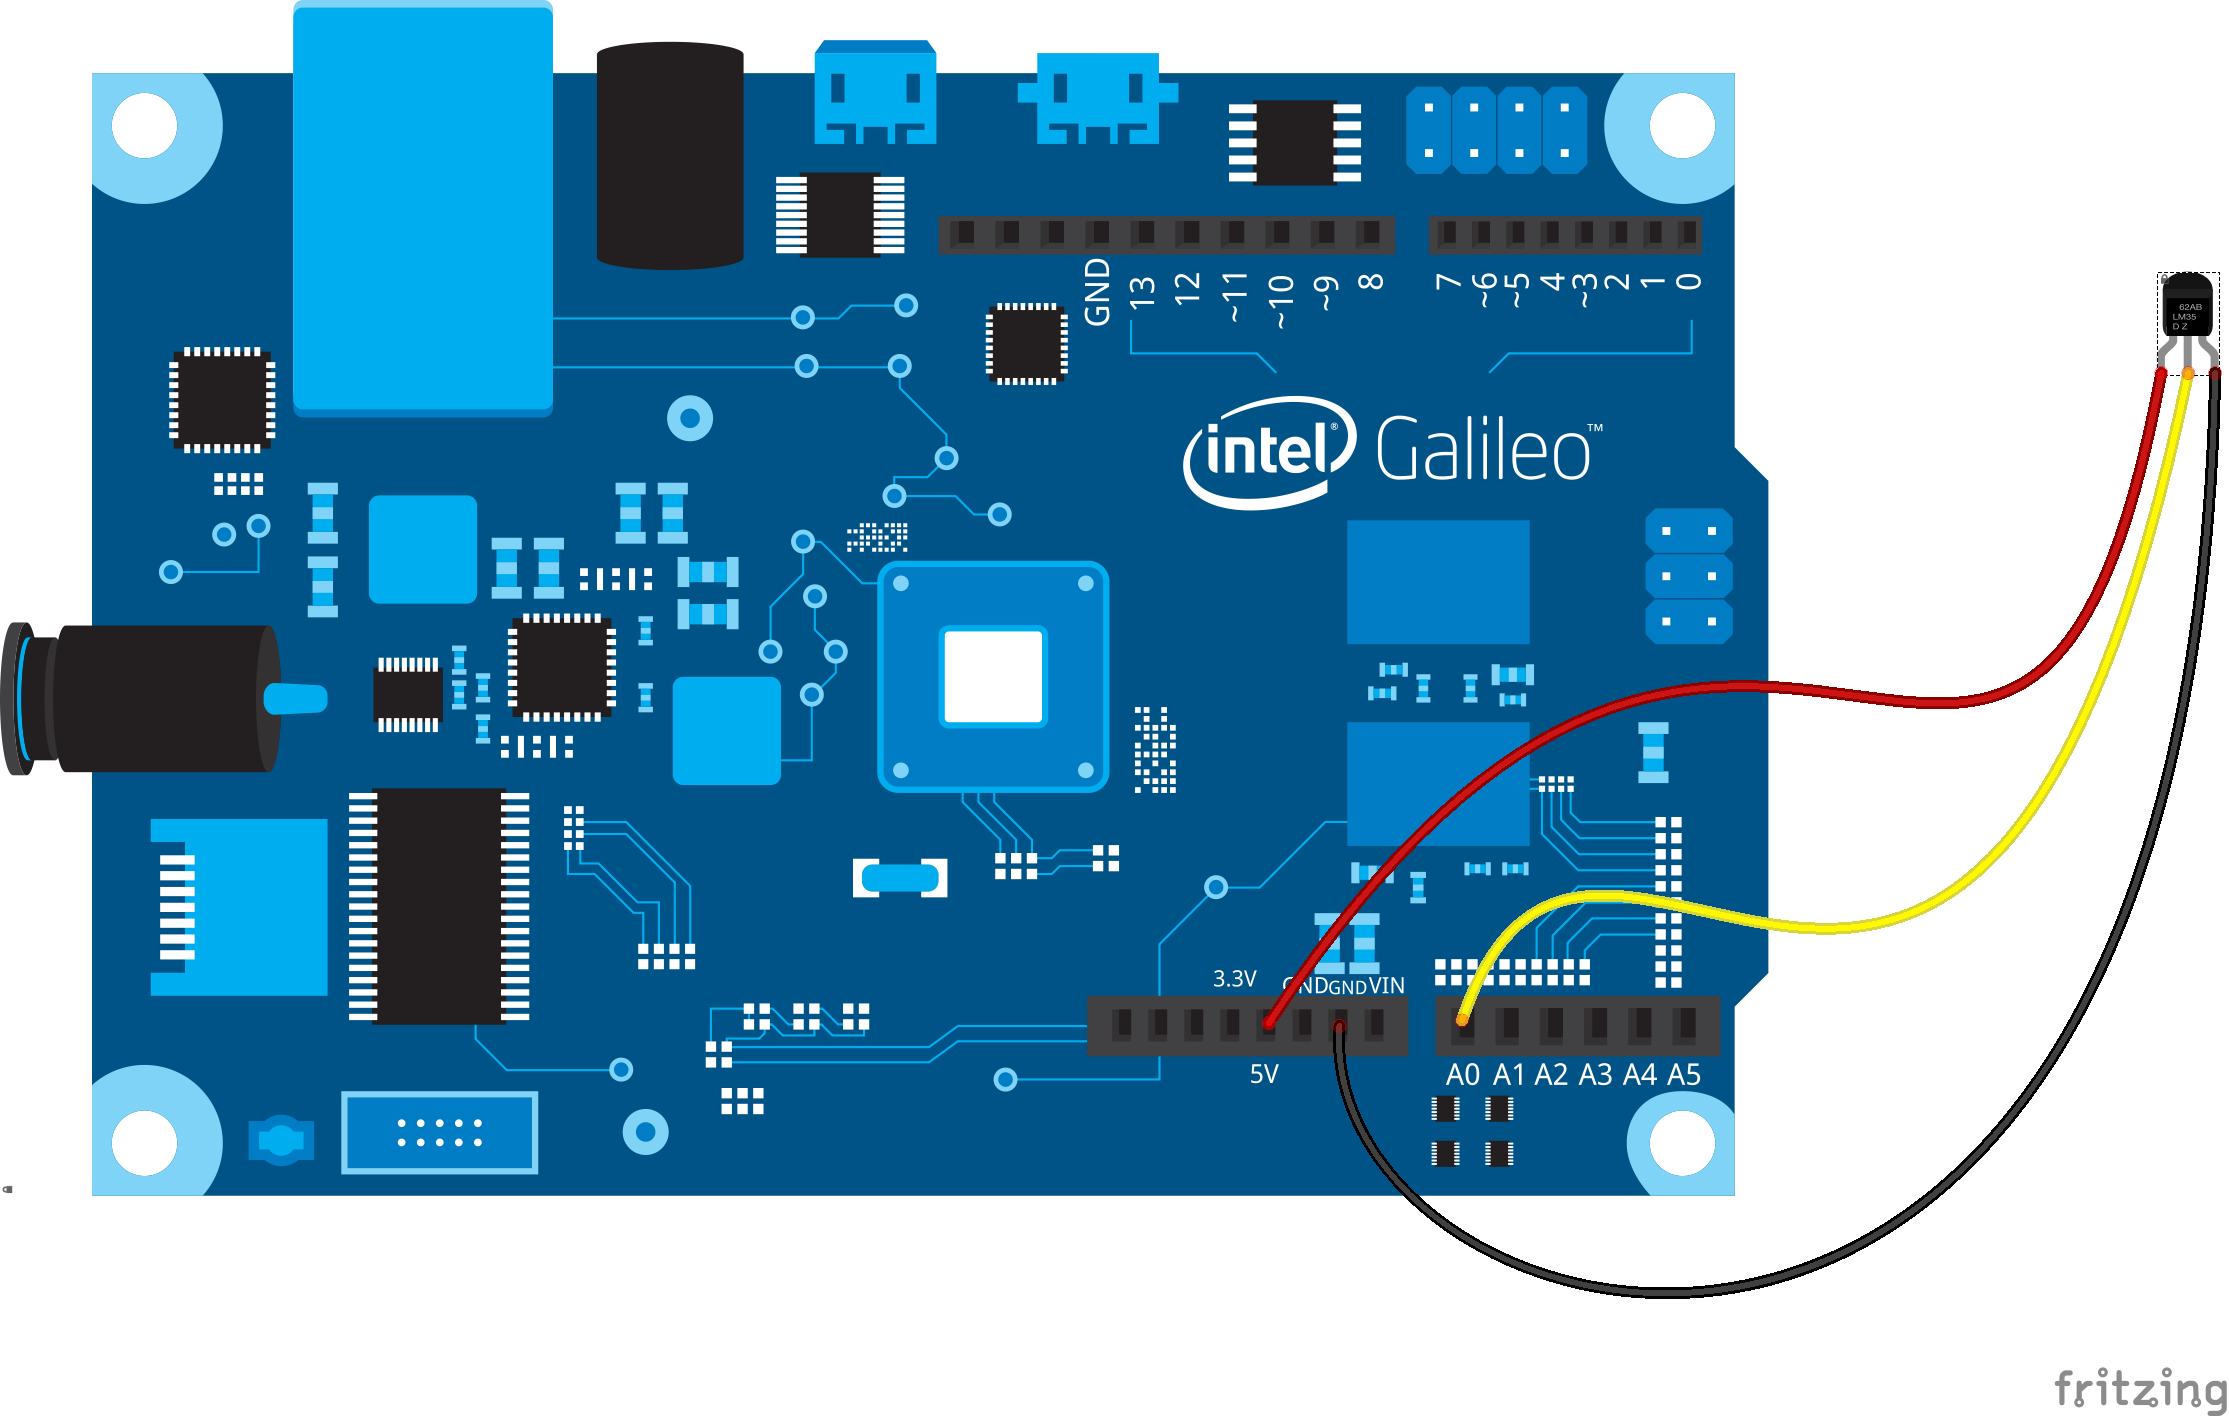
Analog temperature sensor LM35 is a low-cost temperature, with operating temperature from -55 to 150 *C. It consists of 3 pins; left pin - supply voltage, middle pin - ground, right pin - signal output.

How to connect
Refer the schematic diagram below on how to connect lm35 with Galileo.

Warning: Always connect ‘Ground’ pin first! The connect signal output to analog pin 0 and then supply voltage to 5V pin on Galileo board.
Write the code
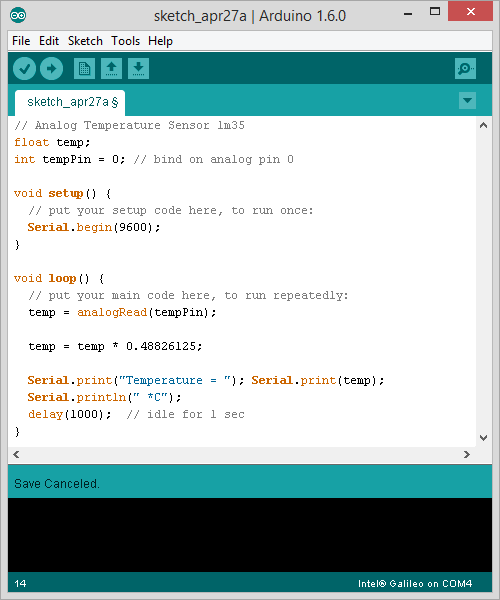
In this example, we will use Arduino sketch to read the temperature. Open your Arduino IDE and write these line of codes.

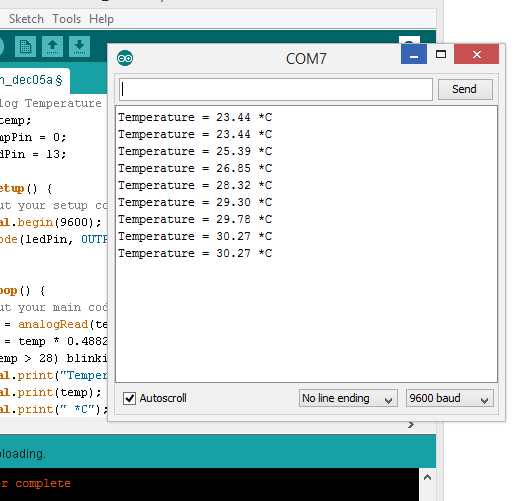
Compile and upload. Open ‘Serial Monitor’ to display the captured temperature on screen.

Try this out
- Modify the code. Use analog temperature sensor (LM35) to blink built-in LED (pin 13). Do quick blinking if the temperature goes above 30 *C. Otherwise blink slowly.
blog comments powered by Disqus