Overview
Here we show you how to setup development environment for Intel Galileo in Windows.
Activity: Setup Galileo in Windows
This instruction is for the first time you setup Galileo in your PC.
1. Download Intel Galileo Software
Navigate to Intel Galileo software download webpage. Choose a correct software package accordingly to your platform (The current version of Galileo software at the time of writing is 1.0.4).
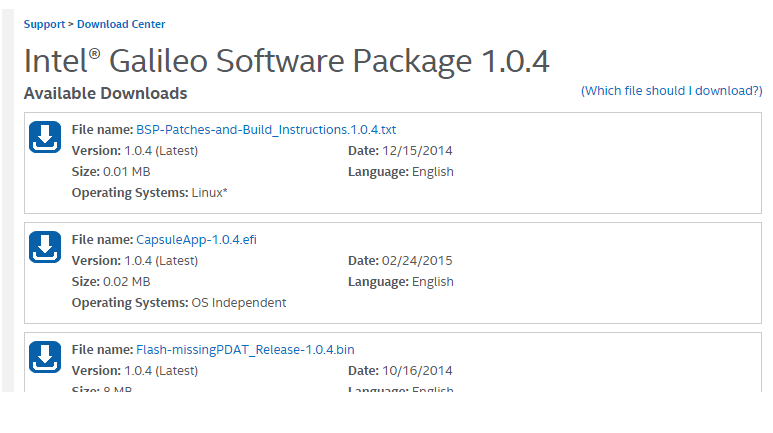
For Windows, you can download “IntelArduino-1.6.0-Windows-Installer.exe” software package to eliminate the hussle of manual installation.

3. Install the software
Run the self-extractor package (.exe file) to install Galileo software.
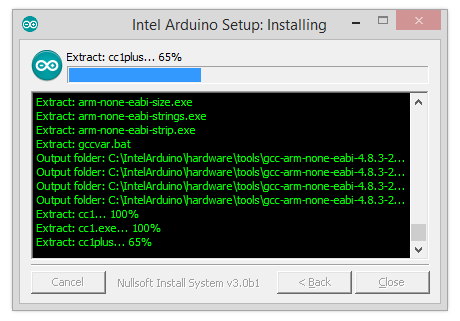
4. Connect Galileo board
Attach power adapter to Galileo board and power it on. Insert micro-USB to “USB Client” port. Connect USB to your PC.
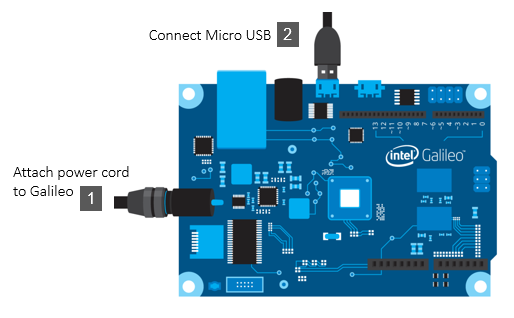
5. Verify your Galileo Connectivity
Open “Device Manager” and make sure your Galileo port presented on the list in ‘Ports (COM & LPT)’.
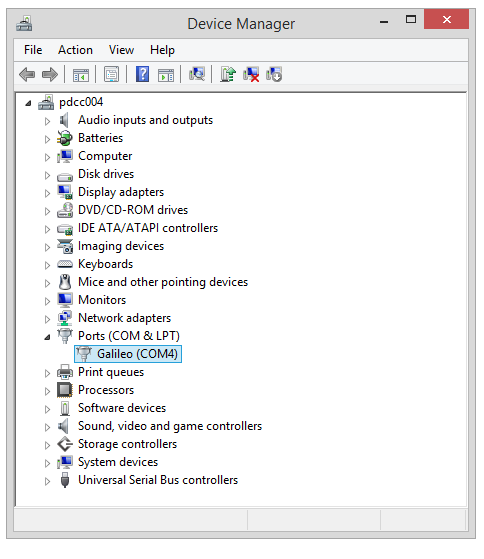
6. Open Arduino IDE
Open Arduino IDE (current version of Arduino IDE is 1.6.0).
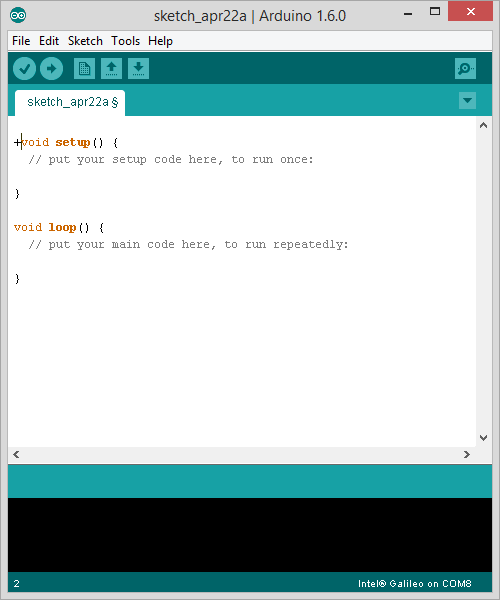
Make sure to choose the correct Galileo board (Gen1 or Gen2) and also to choose the correct Galileo port.
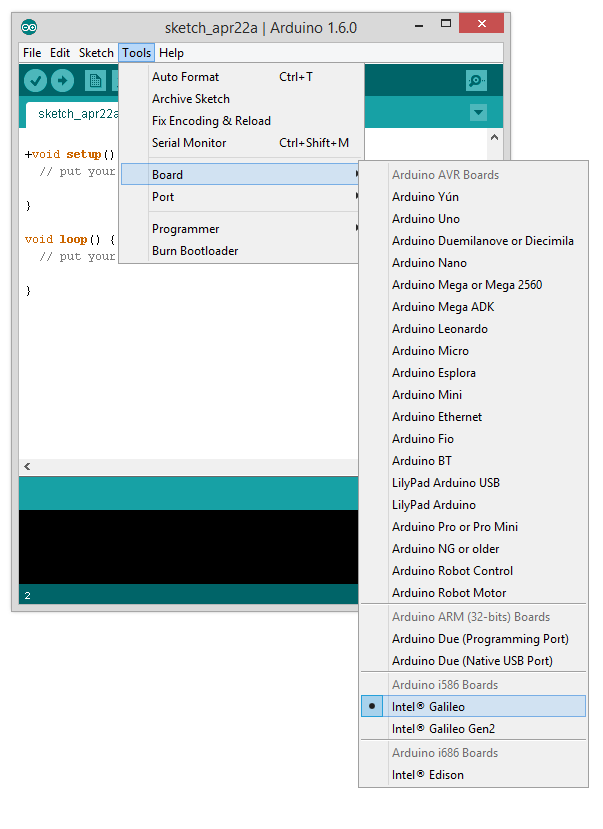
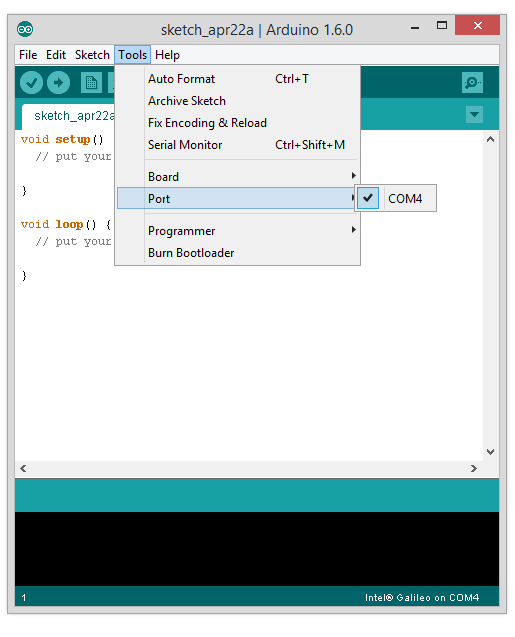
8. Open Blink Example
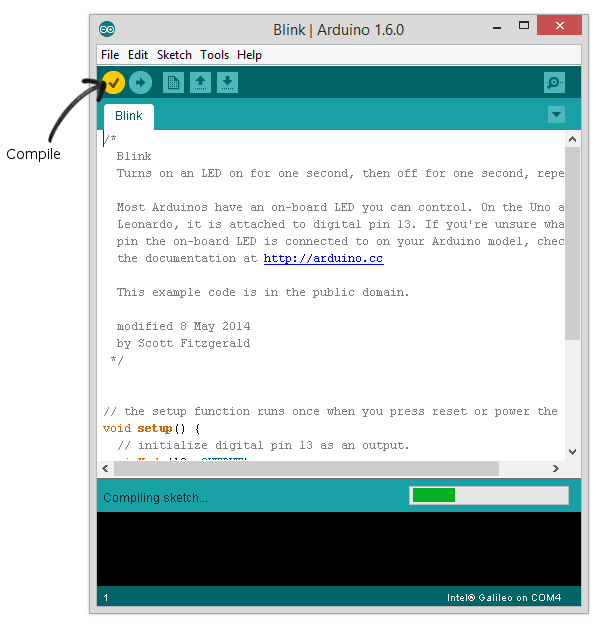
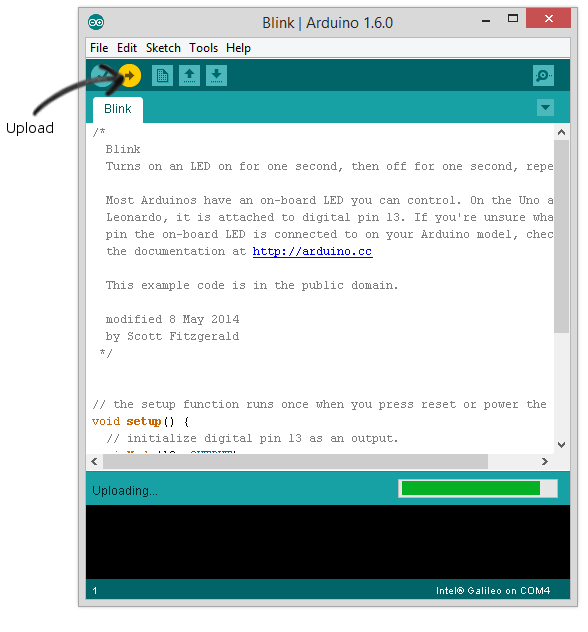
Open Blink example (File > Examples > 01.Basics > Blink). Compile and Upload into Galileo.
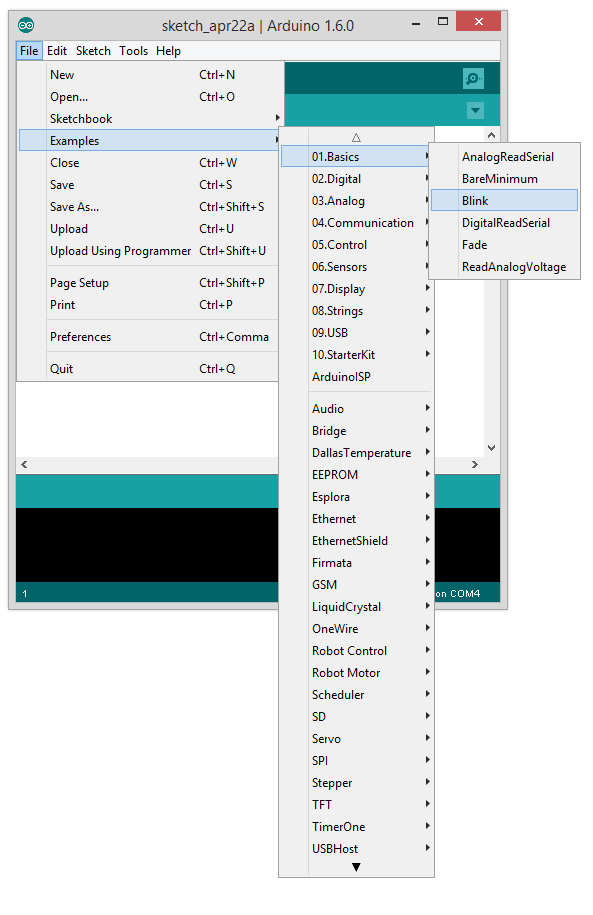
9. Compile
10. Upload
11. Observation
The blink example is a kind a ‘hello world’ in embedded world. This code sample simply blinks a built-in LED (turn on and off the LED for 1 second cycle). What is the idea behind blink example? Could you think of it?
blog comments powered by Disqus